![]() PCHelpWare is a free remote assistance application for Windows that allows you to easily take control of remote computers. This application is great to use when needing to connect to computers in remote offices or when helping out family and friends. With PCHelpWare, you don’t have to worry about the remote users firewall like you do with UltraVNC or other remote assistance applications. Connecting to the remote computer is as easy as having the end user double click a single executable file. In the following tutorial, I would like to walk you through installing, configuring, and using PCHelpWare.
PCHelpWare is a free remote assistance application for Windows that allows you to easily take control of remote computers. This application is great to use when needing to connect to computers in remote offices or when helping out family and friends. With PCHelpWare, you don’t have to worry about the remote users firewall like you do with UltraVNC or other remote assistance applications. Connecting to the remote computer is as easy as having the end user double click a single executable file. In the following tutorial, I would like to walk you through installing, configuring, and using PCHelpWare.
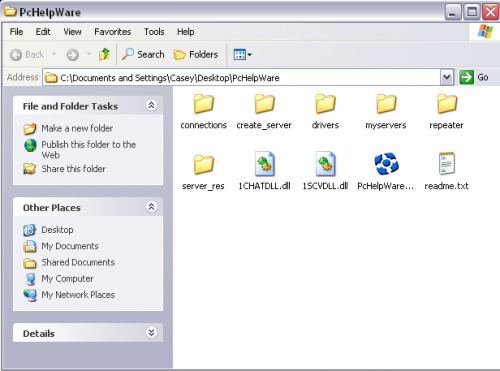
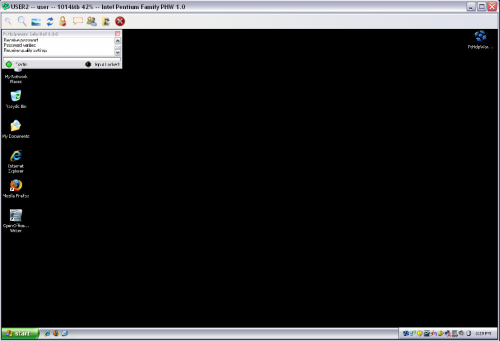
Step 1: Download PCHelpWare and extract the zip file. Open the folder and double click PCHelpWare_viewer.exe.
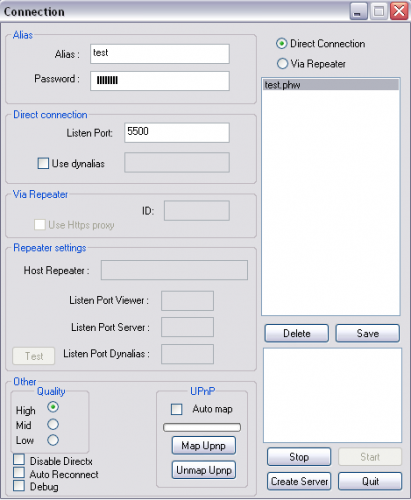
Step 2: Enter an “Alias” which is what you want to call these particular connection settings and enter a password. Set your “Listen Port” to 5500. Make sure this port is open on your router or firewall. If your router supports UPnP then checking this box will automatically forward the router ports. Leave “Direct Connection” checked unless you are using the Repeater service to bypass your firewall. All of the other settings can stay the same.

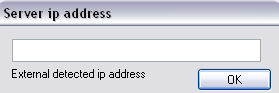
Step 3: Click “Save” and then click “Create Server”. You will be prompted for your IP address. If you are going to be connecting to computers on your network then just enter your internal IP address. If you are connecting to computers over the internet then you will need to enter your public IP address. If you are not sure what it is, go to WhatIsMyIP.com. Remember you will need port 5500 open on your router or firewall.
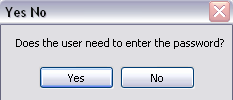
Step 4: Next, you will be asked “Does the user need to enter the password”. Click “No”.
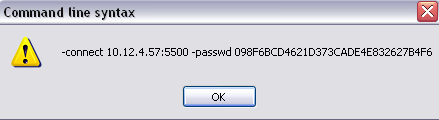
Step 5: You will then receive a dialog box with the IP address and password. Click “Ok”.
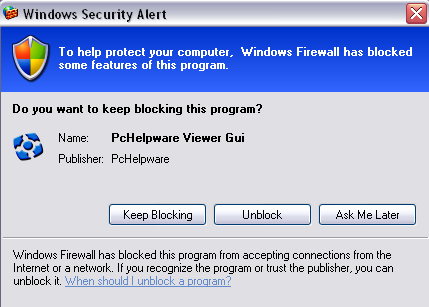
Step 6: If you receive a Windows Security Alert, be sure to click “Unblock”.
Step 7: Click the “Start” button in the bottom right corner to start the viewer service.
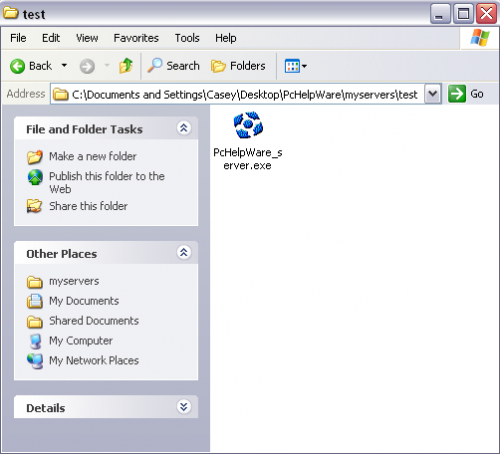
Step 8: Open the folder that you extracted your PCHelpWare files to and navigate to the “myservers” folder. In this folder you should see a folder with the name of the “Alias” you created. Open that folder and you will see a single executable file called PcHelpWare_server.exe. This is the file that you will need to send to the remote user.
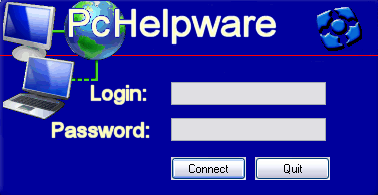
Step 9: The remote user will then double click the file and see a login screen. Since you didn’t require the user to enter a password, (see step 4) the user will only have to click “Connect”.
You will now be controlling the remote user’s computer. For maximum screen size, click the “Full Screen” button at the top. You will also have the ability to to chat with the remote user.
If you have any experience with PCHelpWare or any other remote assistance applications feel free to share.

20 Comments
Anonymous
January 15, 2008i am setting up everything as you mentioned, but i cant get it work.
please help me more.
Casey
January 18, 2008I’m not sure which part you are stuck at but most problems occur when port 5500 is not open on your router or firewall. PortForward.com is a great site for helping you do this. Also make sure you are using your public IP address too.
Anonymous
March 3, 2008I don’t know if you’ve seen this or not, but Crossloop is basically zero configuration remote desktop utility. It does require there to be a person on either end for it to work, though. You basically just install it, execute it, share the passkey with your friend, and connect. And btw registering for an account is OPTIONAL. But you wouldn’t know it by the first screen that pops up when you fire it up, asking to login or register. Just click the big red X on that first screen and it will just skip that part. Then you’re good to go. http://www.crossloop.com
Anonymous
July 14, 2008Problem with CrossLoop is if you have to support someone who does not have admin rights. With the UltraVNC solution as it’s a stand alone exe anyone can launch it. Otherwise…. CrossLoop is excellent.
Joseph Otieno
August 28, 2008Please help in the project that i am doing research onhow to control computer using remote i am stuck only in creating senser that control the computer
marc
September 20, 2008how do you send an exe. file by email. I have tried gmail and hotmail and they both won’t let you send and exe file
Robert
September 20, 2008Hi Marc,
Most e-mail will not allow you to send .exe files as they are being blocked for virus protection. The following are two options I have used.
1) Put the .exe in a .zip file. Even easier change the extension from .exe to .zip. The either tell the receipent to extract the .zip file or tell the other user to rename the file when they receive it.
2) If you have a website you can just send the link to the file in your e-mail pointing to the file that you have uploaded to your web site.
Those are probably the easiest work arounds.
Anonymous
December 14, 2008I have WinXP Pro and my associate has Vista Home Prem. Will it work cross-platform or will I need to install Vista?
motogoat
February 4, 2009Yes, it it cross-platform with Windows 95, 98, ME, 2000, 2003, XP, Vista
Charles
February 5, 2009The link for the download of the PcHelpware is broken. It routes you back to the main uVNC page. The link should be changed to http://www.uvnc.com/pchelpware/download.html
Whatif
May 12, 2009This is an entire waste of time.
5500 port open in router.
5500 port allowed in firewalls
public address used
all prompts followed
can’t connect!!!!!!!!!!!!!!!!!!
It’s crap
Others work okay like Tight VNC, AAMMY, RDC etc but not this program!!
Martyd
July 5, 2009Even for the small price, I think I will stick with GoToAssist to provide support to my clients
Much simpler to setup and less involved. I was never very happy with the insecurity of VNC connections anyway.
Thanks for the instructions, at least they worked
Matt
August 25, 2009@Martyd: If you have issues with the insecurities of VNc connections, just install ssh server onto the machines, that way when you need to actually do anything with VNC, you can tunnel the VNC connection through SSH. and for added security, you could use a custom SSH port, like I do. Also, use SSH protocol 2, not 1..
Burt
September 11, 2009Step 1.5: Download the pchelpware patch and apply it. Unfortunately, there’s no updated download of pchelpware, so you have to do the patching as a separate step.
Alex Lutz
March 16, 2010I’m surprised no one has mentioned LOGMEIN.COM – This site is freaking amazing. You can remote control pc’s and pretty much do anything you need. Very easy to setup and its all completely FREE. Check it out! email me with questions for sure. alexinslc [at] gmail [dot] com
HyperOptic
April 17, 2010The problem with logmein is that you cannot send an exe. You’ll first need to add all pc’s manaully through to site before you can connect to them.
And while log me in is great, the problem is that with other programs users need to give permission before you can go in. Gives the user the security of that we need permission to go in.
I was wondering why nobody would mention Teamviewer.
Basicly same as VNC, but even easier 🙂
Ignas
July 9, 2010Teamviewer.
No need to open ports, works throu all firewall’s or NAT’s or whatever. You can pass user single executable file, no need to install anything. Simple
Strony internetowe Kielce
November 25, 2011Apple is shit. Will go for sony
Bhupendra Choudhary
January 31, 2020Team viewer also works on the same concept.
Alan
December 30, 2023I am still using PCHelpWare.
12 years running and going strong on Windows 10 as well!
Leave A Response