![]() Babysitting a Windows XP installation is no fun. Time consuming! And the installation is just the beginning of it. After it’s finished, you have to install drivers, tweak settings, and then proceed to install what feels like a million Windows updates which are usually accompanied by a couple of reboots. If you are like me and would prefer to have this process automated then you’ve come to the right place. I would like to show you how you can automate this whole process using a great little program called Windows XP nLite.
Babysitting a Windows XP installation is no fun. Time consuming! And the installation is just the beginning of it. After it’s finished, you have to install drivers, tweak settings, and then proceed to install what feels like a million Windows updates which are usually accompanied by a couple of reboots. If you are like me and would prefer to have this process automated then you’ve come to the right place. I would like to show you how you can automate this whole process using a great little program called Windows XP nLite.
Before we get started you will need a Windows XP installation CD as well as the product key. You will also need a blank CD where you will write your new installation files to.
Step 1: Download Windows XP nLite
Download and install nLite. When you are finished run the program.
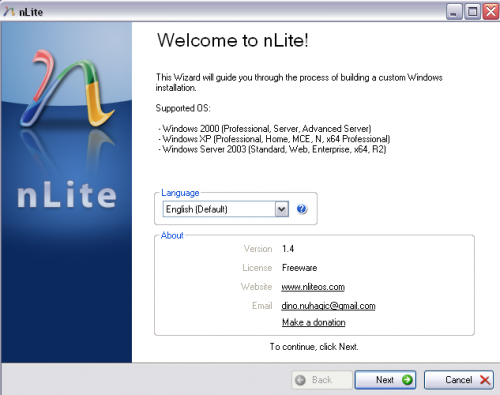
Step 2: Select Language at the nLite Welcome Page
Select your language in the welcome page as shown below, and click “Next”.
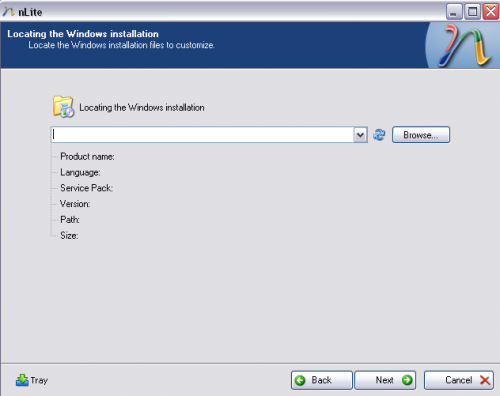
Step 3: Browse and Choose Your Windows XP installation CD
You will now be asked to locate your Windows installation files. Click browse and choose your Windows XP installation CD. You will also be asked where you would like to save your Windows XP installation files. Create a new folder, name it whatever you like, and click “Ok”. nLite will now begin to copy the installation files from the CD to the folder you created. When it is finished, click “Next”.
Step 4: Select or adjust settings
You will now be prompted with a Presets window. This is where you can choose your previous settings if you have already created an unattended installation CD before. Click “Next”.

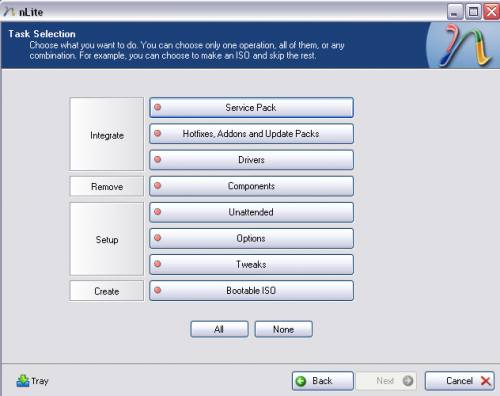
Step 5: Short Cut – Select all Operations
Now you will see the Task Selection window. This is where you will choose the operations you would like to perform. Click “All” and then “Next.
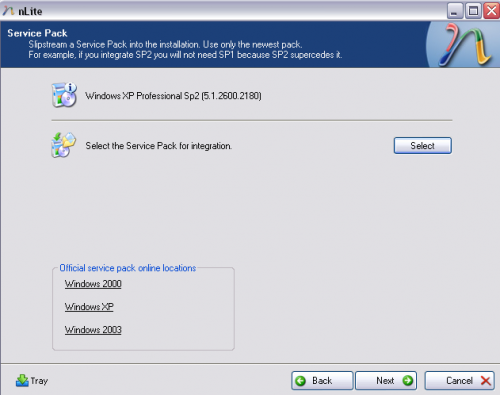
Step 6: Select Windows XP Service Pack
You will now be prompted for the location of the Windows Service Pack you would like to integrate into the installation. If your Windows XP Installation CD doesn’t include Service Pack 2 then download it here and select it. When you are finished, click “Next”.
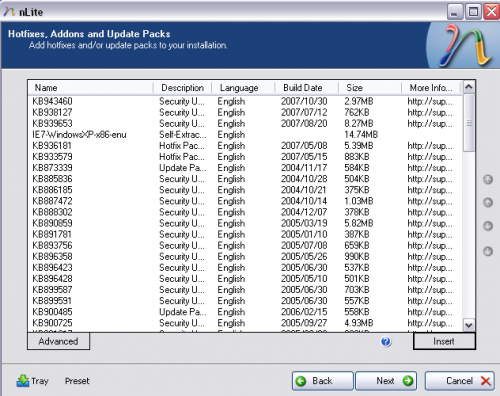
Step 7: Set nLite to install Windows Updates
Here you can set your unattended installation CD to install the Windows updates during the installation process. In order to do this, you need to download all of the updates from Microsoft and save them to a folder. There is a great little program called Windows Updates Downloader that will help you with this. Once you download them, click “Insert” and select them all. Then click “Next”.
Step 8: Select Specific Drivers if Necessary
Now you can select what specific drivers you want to preinstall with Windows besides the ones that are installed by default. If you don’t have any just click “Next”.

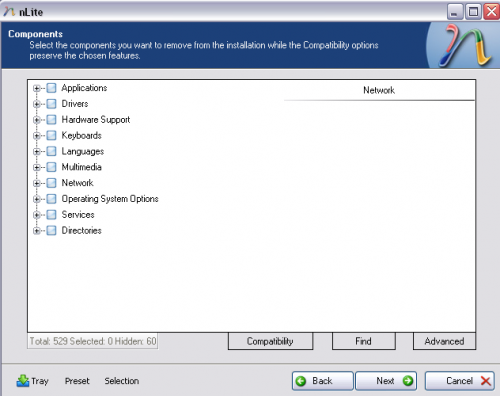
Step 9: Select Windows Components to Not Install if necessary
Here you will be able to choose which Windows components not to install. When you are finished, click “Next”.
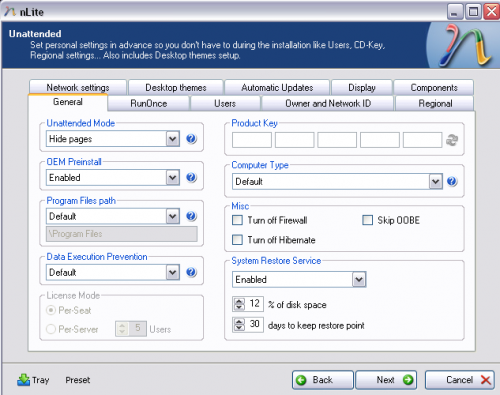
Step 10: Set up Unattended XP Installation Using nLite
Now you will be able to set up the unattended part of the installation. If you have a product key, enter it here so you aren’t prompted for it during the installation. You can also tweak all of the other predefined settings. When you are finished, click “Next”.
Step 11: Make Last Minute Settings Changes
Here you will be able to change settings such as the language, install path or set up OEM branding. When you are finished, click “Next”.
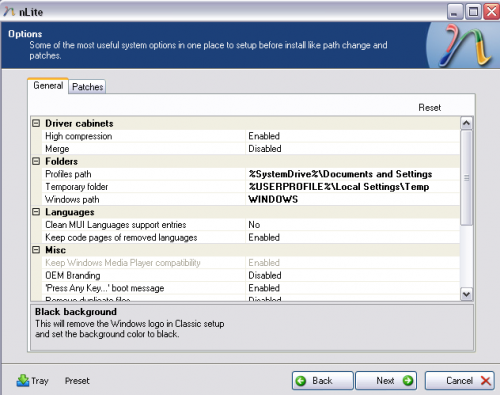
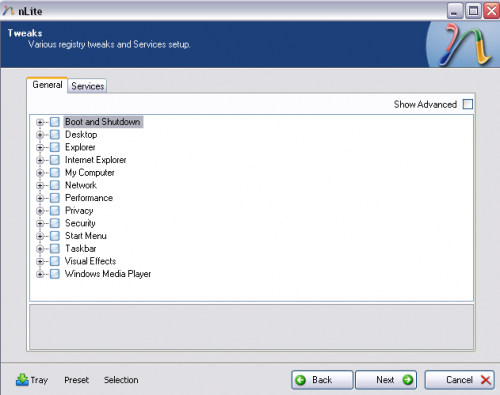
Step 12: Set up Other Settings
Here you can tweak various other Windows settings that you would normally set up after the installation finishes. Click “Next” when you are finished.
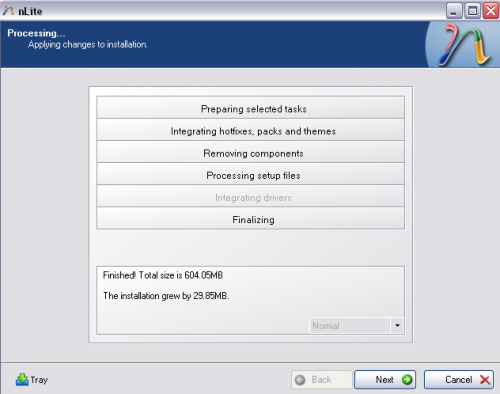
Step 13: Start the nLite Process
You will now receive a prompt that says “Do You Want To Start The Process”. Click “Yes” and nLite will apply the patches and changes you made to your Windows installation folder. When the process has completed it will tell you how large your installation folder is. Click “Next”.
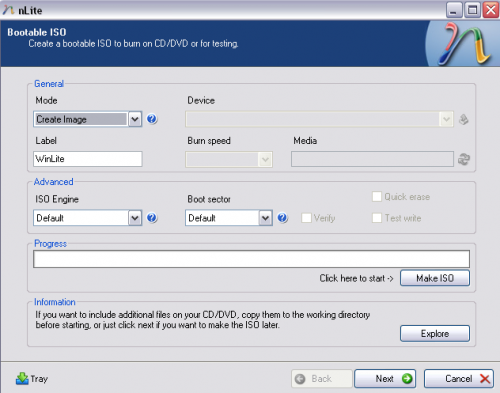
Step 14: Create ISO file for Windows XP Unattended Installation CD
Now you can create an ISO file for your new Windows XP unattended installation CD. You can also burn the the files directly to a CD without creating an ISO.
And there you have it, your very own Windows XP unattended installation CD. If you have any experience with Windows XP nLite or any other programs used for creating unattended installation CDs, feel free to post.

28 Comments
Chris
September 2, 2008Thanks for this – it should save hours of manual installing, which is something I seem to do constantly
shajhan
November 1, 2008very helpfull and save hours of time’ this cant go wrong for anyone ease of use,
thanks
edwin
November 19, 2008i followed your instructions but for some reason windows xp ask me for a product key during the unattended installation. the product key i used is genuine. i have searched online for a solution but no success, but i gotta tell you that everything else gets installed automatically except for the product key which i have to enter. just for the record, on step10 under unattended mode i chose “fully automated” what could be wrong? thanks in advance.
edwin
November 20, 2008please never mind my previous message, i finally got the unattended installation to work and the problem was that i was using a program that is used to install virtual machines which for some reason it kept asking for the product key, so today i used an actual computer to test the unattended cd and it worked. thank you.
Chiran Kumar Ghimire
March 24, 2009I`m Trying iT.
dongvc
April 1, 2009I’ll try this one, hope it works for me…
banana.beach
June 19, 2009Thaks a lot for this great guide.
Ally
September 5, 2009awesome man
🙂
Good Jaaab!!
John Dong
September 17, 2009Hey, this is great! I finish creating a image. I was wondering if you can add in some programs with this ISO image? Is it possible? Thanks in advance!
Casey
September 18, 2009Hi John,
Unfortunately, I am not aware of a way to do this in the current version of nLite.
WharfRat
December 17, 2009Yes you can add files to your ISO or CD/DVD.
On the Bootable ISO page of nLite (last page) there is an information box with an “Explore” button. You can use this button to navigate to your files, or just copy them into your working folder before burning your ISO or disc.
Casey
December 17, 2009Thanks WharfRat.
Thomsd
November 23, 2009is there any way to do it with the currently installed os? i cant find the product key for the cd i have and its not the one from this computer
Casey
November 27, 2009Hi Thomsd,
As far as I know, there is no way to do this with the currently installed OS. However, you can retrieve your Product Key using a program like WinKeyLite. http://www.emergingtechs.com/posts/how-find-and-change-windows-vista-xp-and-2003-product-key/ Hope this helps.
Saqib
February 28, 2010Wow, its great ireally like it .
Masroorul Hassan
March 15, 2010OOOOh dear bundle of thanks thats what I was looking for….and today I found it…my good luck…but dear I have a question, Can I add applications, drivers for TV Card, Modem etc. please a quick answer will be highly appreciated. thanks once again!!!!
$jonny$
August 18, 2010i still yet to figure out exactly how to make the cd but the tips are good help and not really sure how to add the extra programs to it 🙂 but ill get i sooner or later im sure
Rauf
September 8, 2010thank you very much. you made me really happy. 🙂
Atif
June 7, 2011If my unattended installation succeeds it will be very very helpful and nice.
Atif
June 7, 2011Question
———–
During unattended installation of XP, [partition of disk] portion is manual. Could it be unattended also?
Amin
October 1, 2011dude, i have done all the process, the only thing in which im sucked is the DRIVERS, when i put the drivers, only sound driver was install and nothing else. the theme was installed and i just wanna know two things
1: How to install drivers?
2: How to install softwares??
waiting for your reply…!!
Amin
October 1, 2011i have the setups but i cant install them bcous they are not for the silent installation, i just want the solution for that, is there any..!
Baban Gaigole
December 6, 2011Very nicely written.
Also follow the below mentioned link to find out more.
http://hashprompt.blogspot.com/2011/12/drivers-applications-integration-in.html
matt
February 3, 2012what if i need to use a different product key for each installation? can i leave it blank? can i enter key at the unique keys at the end of my installations?
Anup Kumar
March 4, 2013Dear sir,
I want to do unattended installation of windows xp-2 from CD in a new unformated computer. I have done unattended installation from CD on running computer from support folder of windows xp. But I am not able to do unattended installation from CD in new system. Is there any way to do this?
If yes, Please give me all the steps to be followed.
Thank You
Anup Kumar
India.
SAURABH KUSHWAHA
March 13, 2013HOW TO CREAT WINXP BOOTABLE CD/DVD WITH ALL SERVICE PACK IN ONE CD/DVD
SP1 SP2 SP3
Vishal P Bulbule
August 10, 2014Thanks a ton for such a good instruction to make unattended CD.
Vishal P Bulbule
August 10, 2014Thanks a ton for such a good instruction about making unattended installation CD.
Leave A Response